There is one thing you need to know about me, I’m not exactly a fan of winter. Why? It’s because I can’t stand the cold. However, I do like snow. In fact, the white fluffy stuff is the only thing I like about winter, ha, ha. It’s the time of the year that most of us crave comfort and warmth. You want to cozy up inside, read a good book, or watch your favorite flick. Am I right? So what’s a better way to achieve that comfort than having a hot cup of yummy hot chocolate, huh? I don’t think there’s anything better. Therefore, today I’m sharing with you how to make delicious and decadent hot chocolate bombs that everyone is going to love — right in time for Valentine’s Day.
*This post contains affiliate links for which we may earn a commission at no additional cost to you.
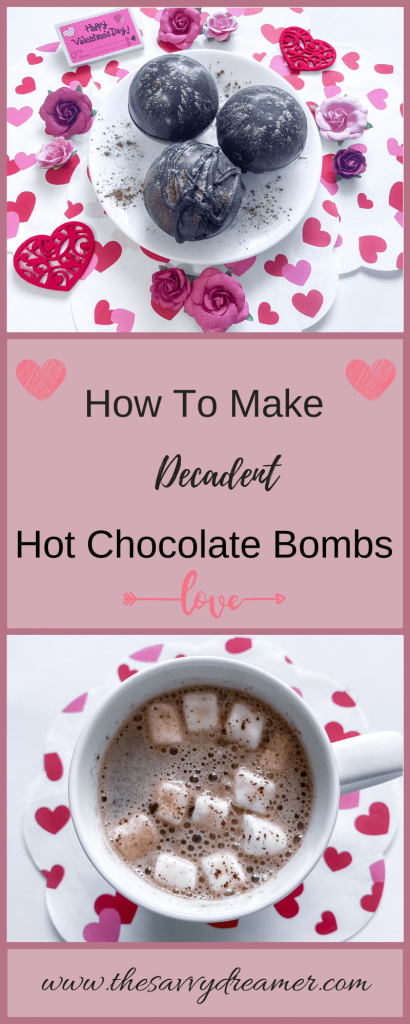
How To Make Decadent Hot Chocolate Bombs

Items You Will Need
Hot Chocolate Bomb Silicone Molds (2)
Double-broiler or a small pot and a metal bowl
Small plate – for melting chocolate cups
Small spoon – for sealing chocolate bombs
Ingredients
Semi-sweet chocolate (I used 1 – 283 gr. bag of Enjoy Life Semi-Sweet Chocolate Chunks)
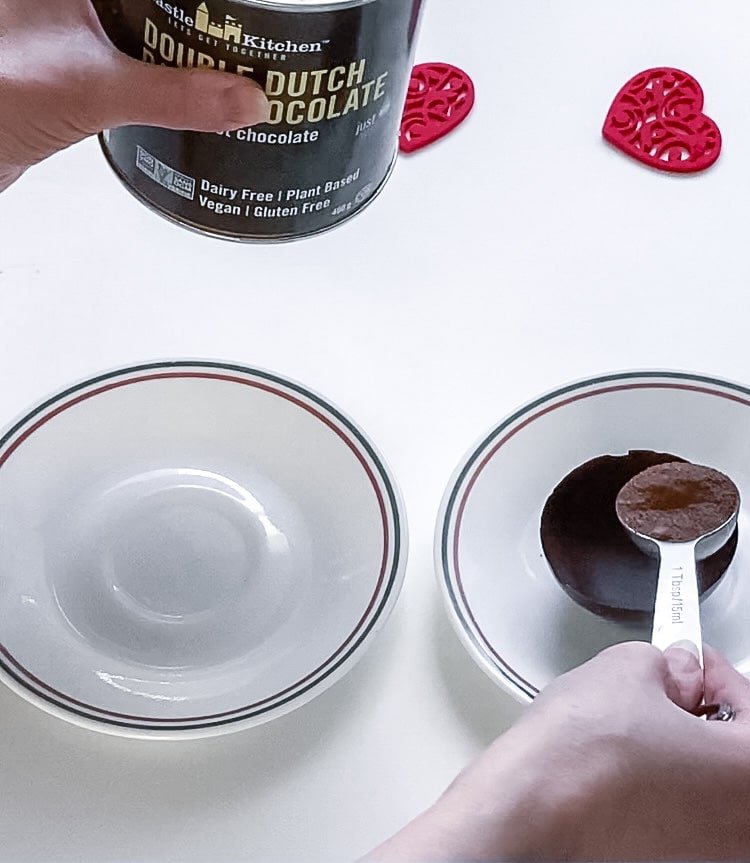
6 tbsp hot chocolate mix (I used the Castle Kitchen Double Dutch Dark Chocolate Premium Hot Chocolate)
12 tbsp mini-marshmallows (I used Dandies Mini Vanilla Flavored Marshmallows)

Directions To Make Decadent Hot Chocolate Bombs
Step #1 – Preconditioning The Chocolate Bomb Molds
If you’re using your hot chocolate bomb molds for the first time, you need to precondition them first. You can do that by placing them in boiling water for about 5 minutes. This process will get rid of the silicone smell. You only need to do this once. Then let them air dry. Now they’re ready to be used.
Step #2 – Melting The Chocolate
Next, you need to melt the semi-sweet chocolate in the double-broiler. Alternatively, you can pour about 1 cup of water into a small pot and warm it up on your stove. I love the Enjoy Life Semi-Sweet Chocolate Chunks because they’re both vegan and gluten-free. Then you can place a metal bowl over the pot. Make sure it fits well and it doesn’t touch the water. Pour the chocolate into the bowl and start stirring it until it melts. Once fully melted, move it away and place the bowl on a heat-proof surface.

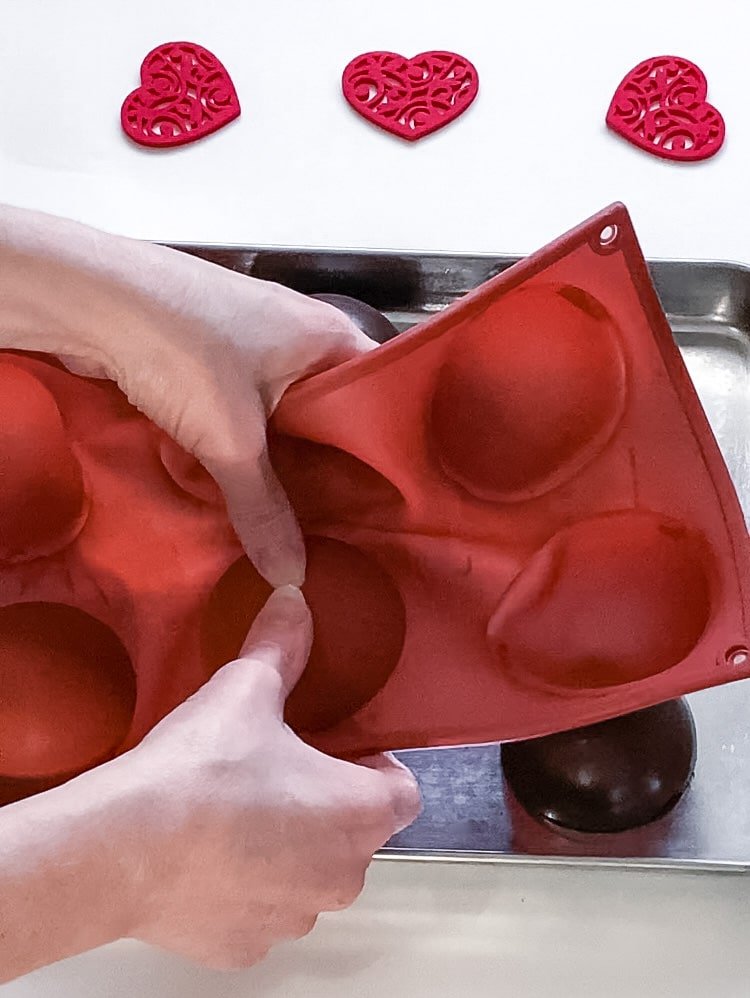
Step #3 – Filling The Molds With The Chocolate
Now you need to pour one tablespoon of melted chocolate into each mold cavity. Once you fill all the cavities, you need to grab a small spoon. Warm the spoon up under hot water. Then using the back of the spoon, spread the chocolate inside the cavities. It’s a really important step because you need to make sure that enough chocolate covers all the sides. That way, once you take out the chocolate bombs, they won’t crack.

When you finish this step, you will need to invert the whole mold over parchment-lined baking sheet. Shake the baking sheet a few times. This process reimburses the chocolate all over the molds. Then flip the mold over and discard the parchment sheet. Or you can just lick the chocolate off of the parchment sheet before you throw it out, ha, ha. It’s what I usually do (wink, wink)
Now, put the mold back on the baking sheet face up and stick it either in the freezer for 5 minutes, or in the refrigerator for 30 minutes.
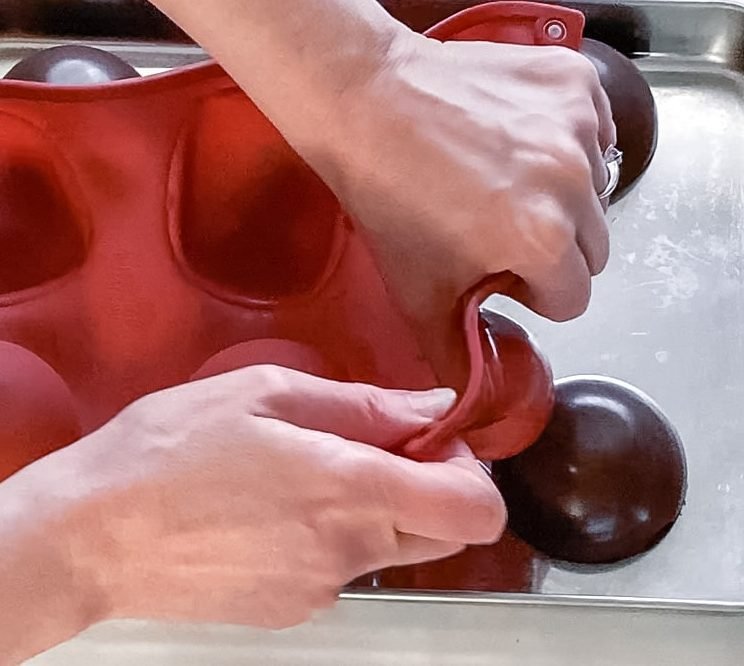
Step #4 – Removing The Chocolate Cups Out Of The Molds
Take the silicone mold out of the freezer or fridge and flip it over onto the baking sheet. Carefully place your thumb in the middle of one of the cavities and gently push. Keep pushing until the chocolate cup comes out. Repeat the process with the remaining chocolate cavities. Now you’re ready for the filling.
Step #5 – Assembling The Chocolate Cups
Fill six chocolate cups with one tablespoon of hot chocolate mix. My favorite mix is the Castle Kitchen Double Dutch Dark Chocolate Premium Hot Chocolate because it’s so delicious and good quality. Therefore it will make a truly decadent hot chocolate bombs. It’s also both vegan and gluten-free.
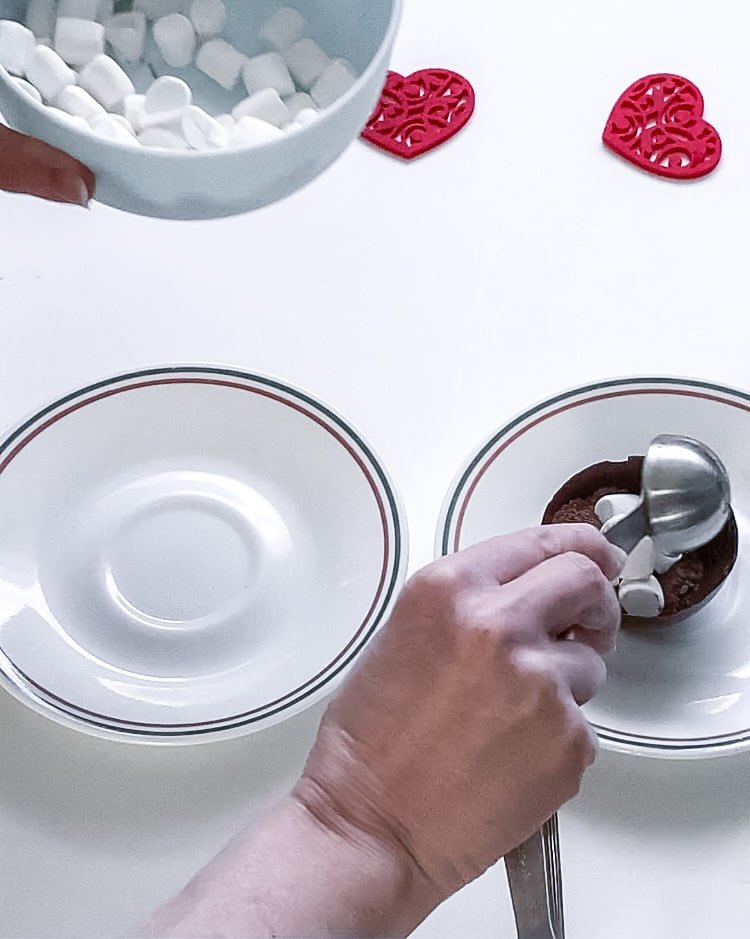
Then top it off with two tablespoons of marshmallows or as many as you can fit. I needed to use a gluten-free brand so I opted for Dandies Mini Vanilla Flavored Marshmallows. And the best thing about them is — they don’t contain any nasty gelatin. Oh, and did I mention they’re also vegan?
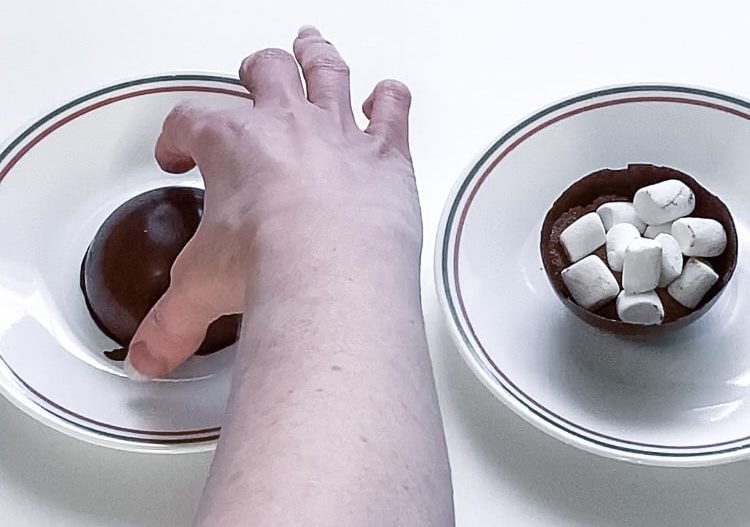
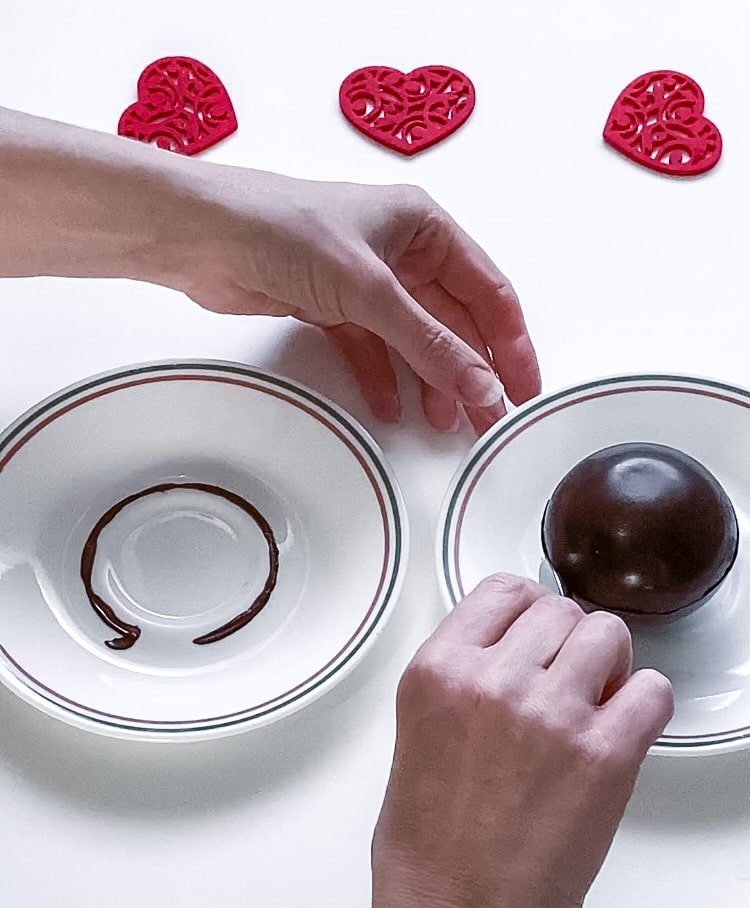
Warm up a small plate under hot water. Dry it off and place one cup of chocolate upside down on the bowl for a few seconds. Lift it up when you see the chocolate rim melting. Now place the cup over the other cup containing the hot chocolate mix and marshmallows.
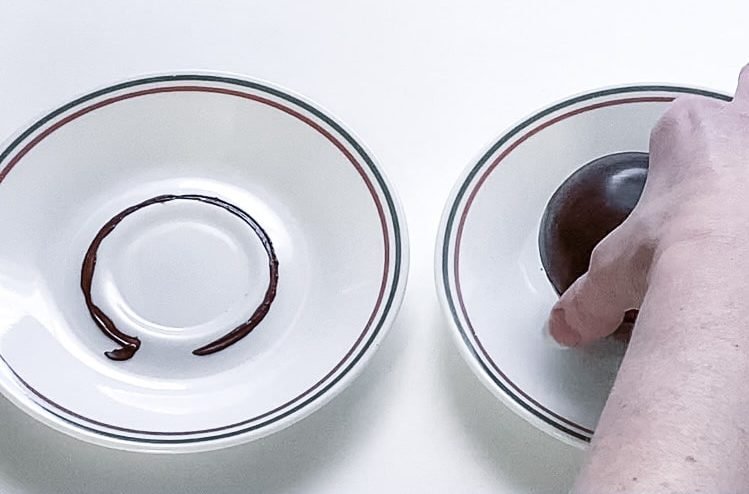
Grab a small spoon and warm it up under hot water. Using the back of the spoon, run it over the seam of the two cups touching. This process will seal the complete chocolate bomb.
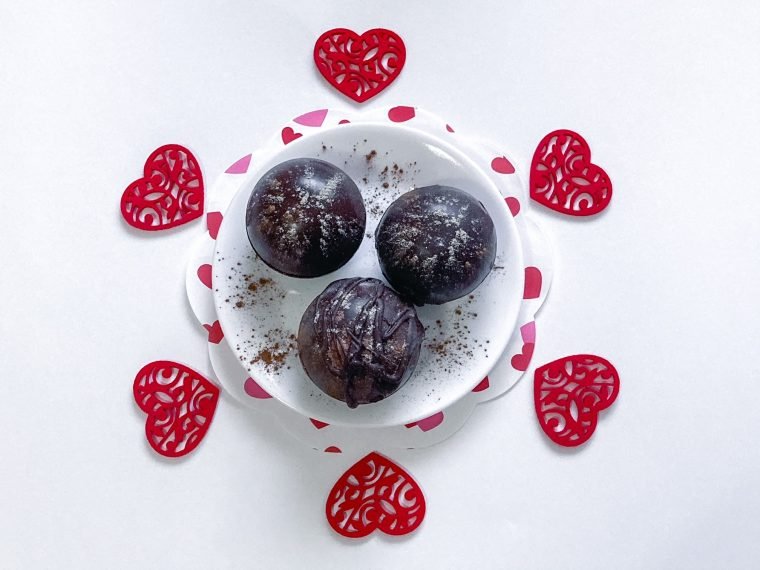
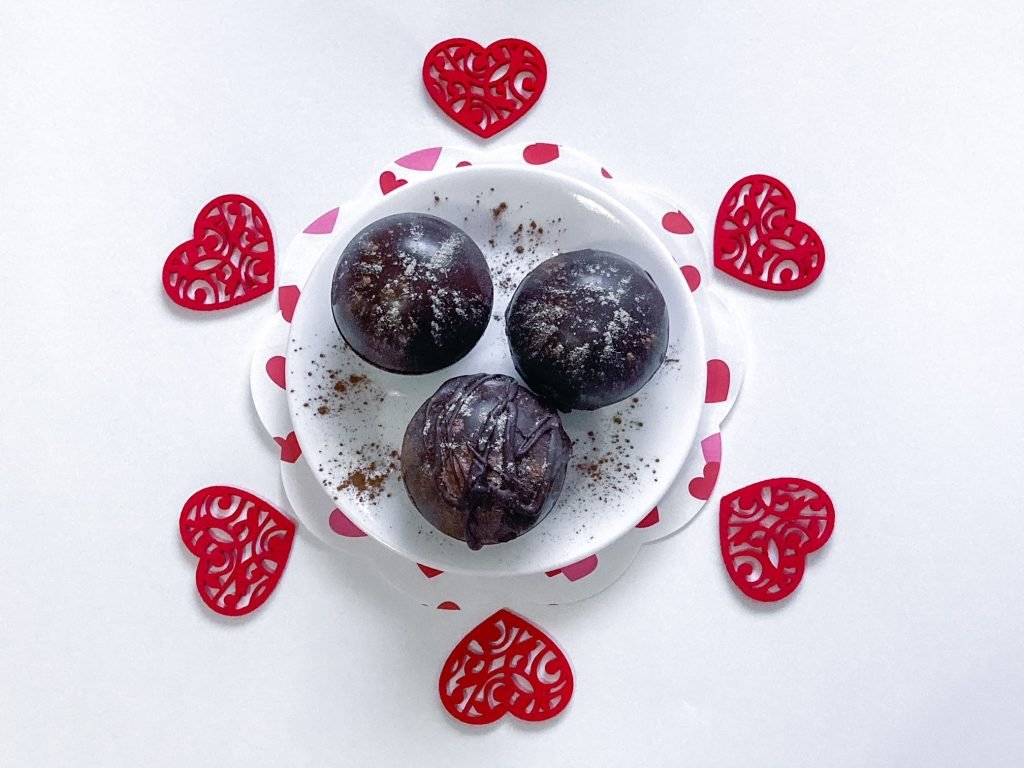
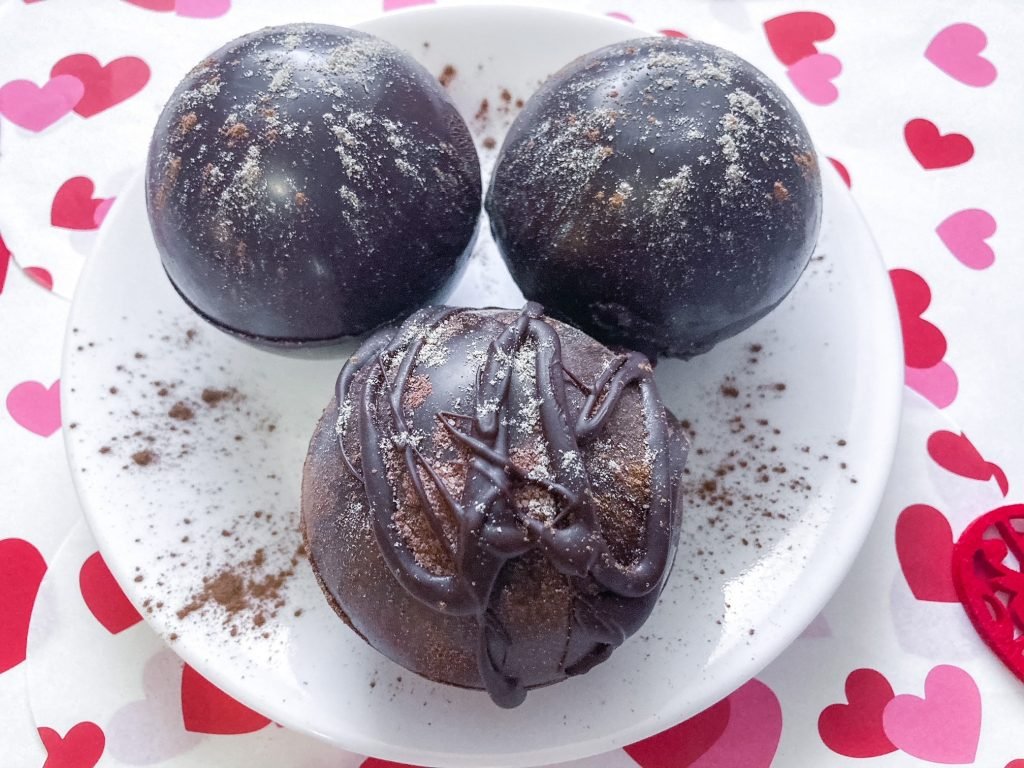
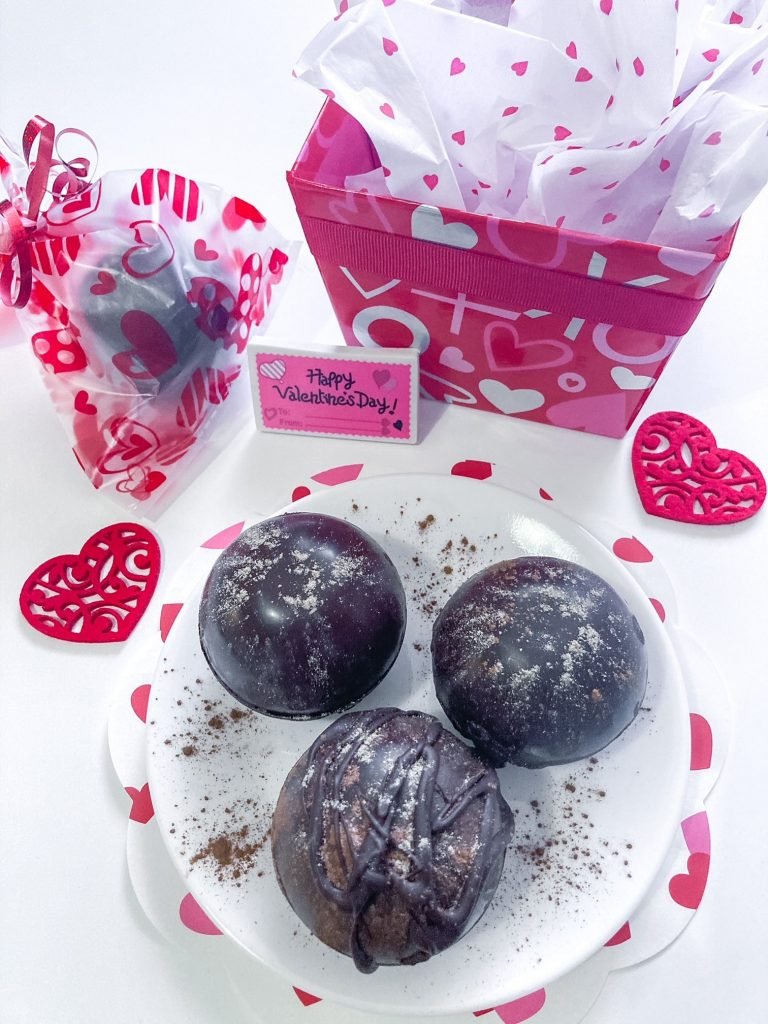
You have now created delicious and decadent hot chocolate bombs. Repeat this with the remaining chocolate bombs, and voila, you’re pretty much done. You can also use some left-over melted chocolate to drizzle over the chocolate bomb to make it look even prettier.


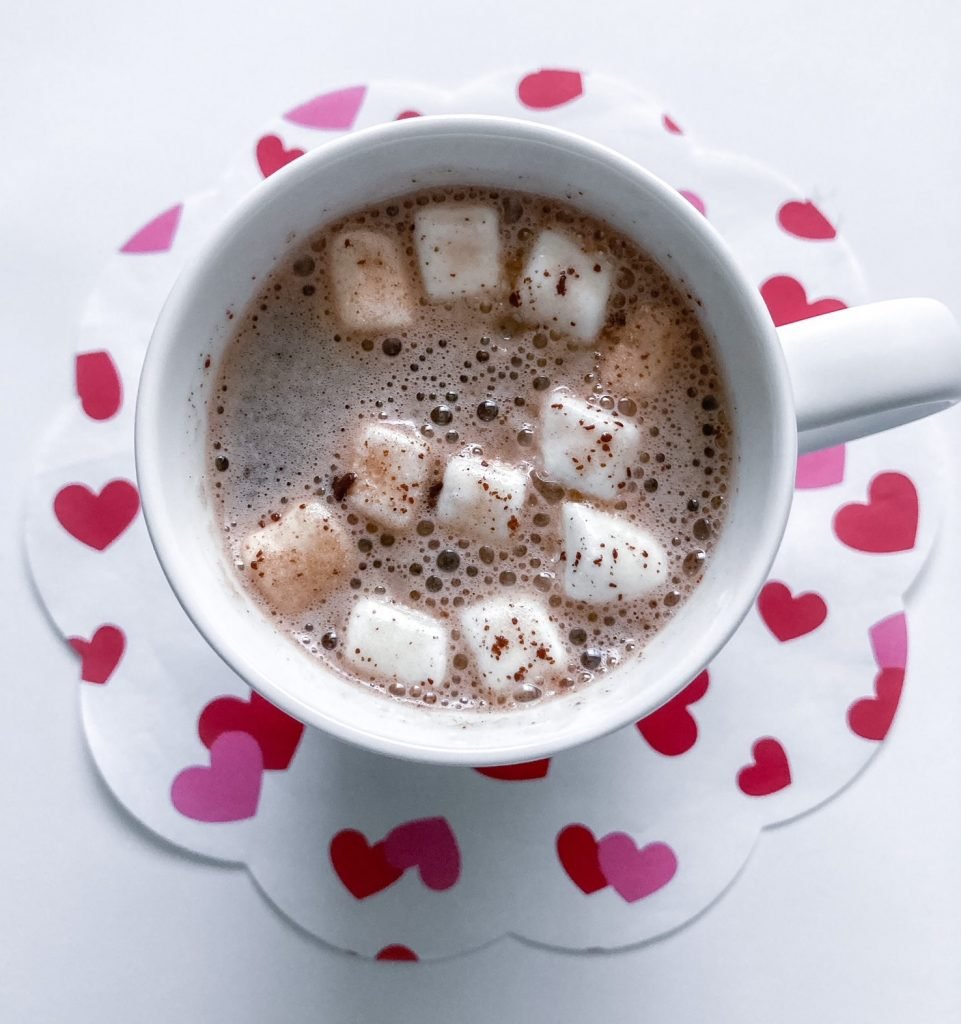
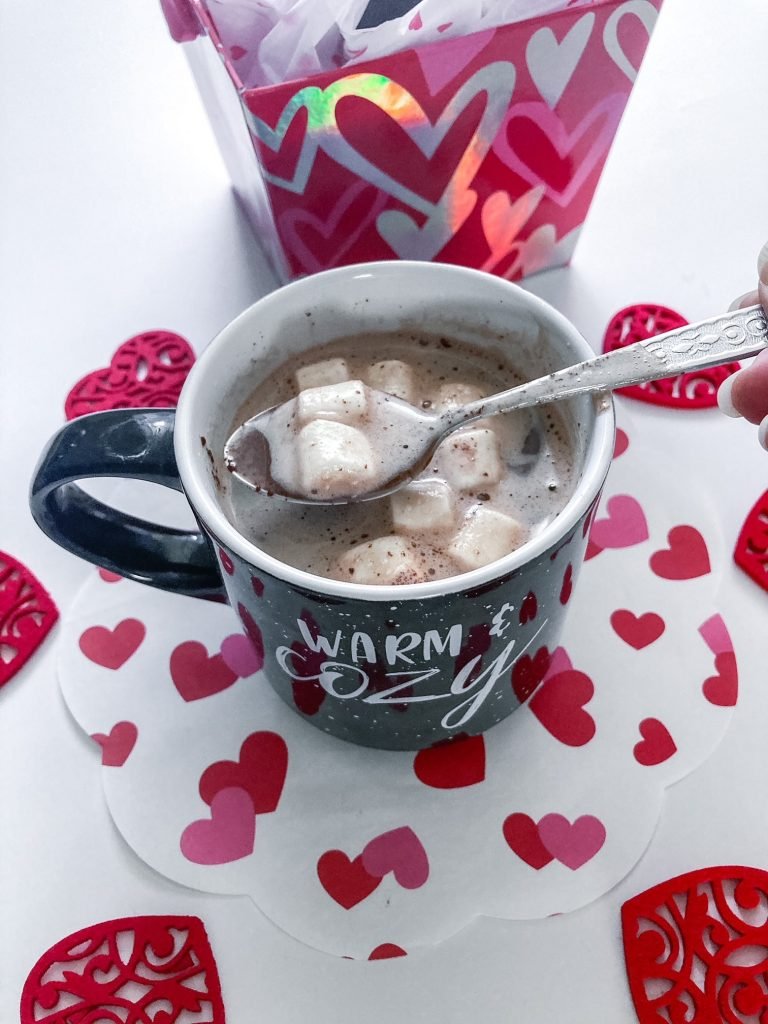
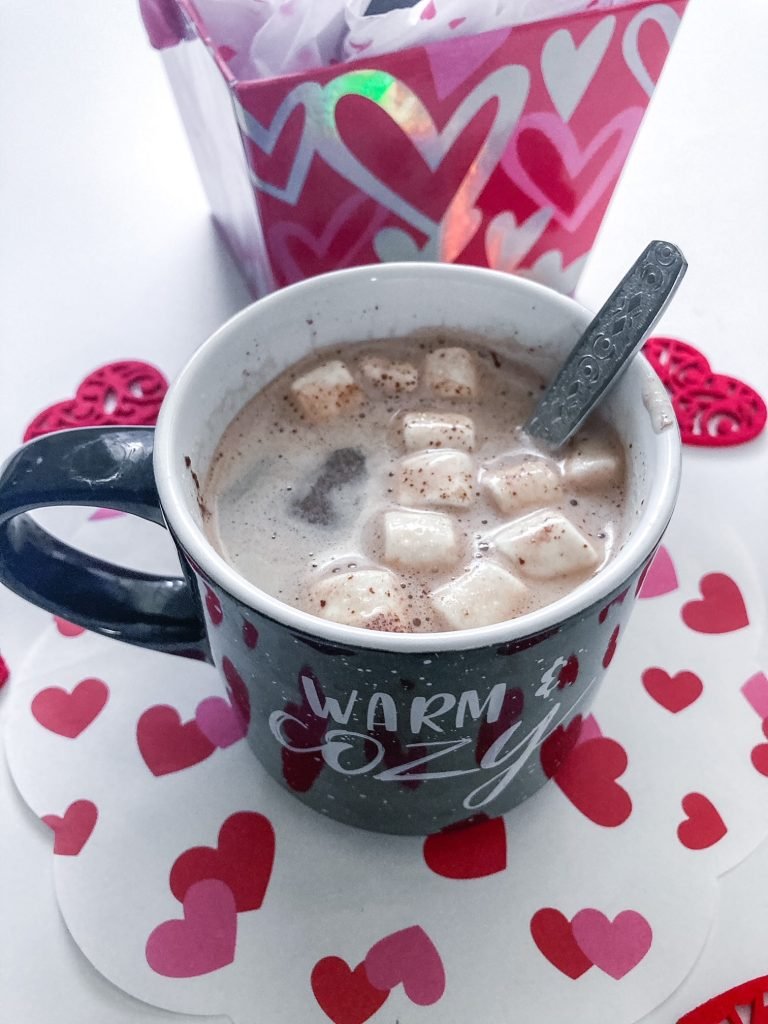
How To Drink These Decadent Hot Chocolate Bombs
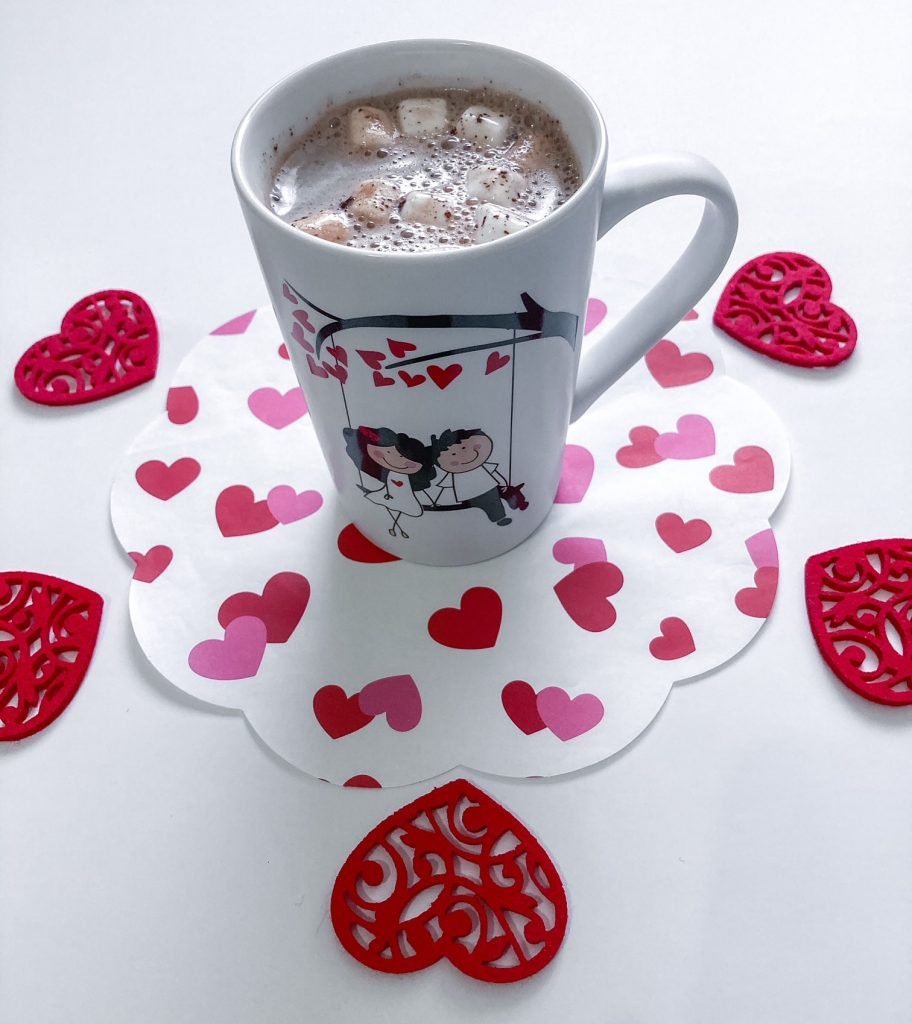
Now that you have prepared the hot chocolate bombs, here comes the best part — drinking them! Yay! I like to use hot milk to dissolve these bombs into because I think it makes for the most decadent experience. However, you can use water if you don’t like milk. You can also substitute regular cow’s milk for other alternatives such as almond milk (I used this option), coconut or oat milk. Either way you do it, it’s going to taste delicious. I promise you.
Conclusion
So this is the whole process to make delicious and decadent hot chocolate bombs. Once you do it, you’ll get a hang of it. Trust me, the first time I made these, I was very nervous. I was worried that the melted chocolate wouldn’t set properly inside of the molds. And then I was freaked out about taking them out of the mold, ha, ha. Let’s just say that part made me sweat a bit. But the good news is there is enough chocolate in the molds. And once you spread the chocolate evenly over all the edges, they will come out nicely when they have had time to cool off properly.
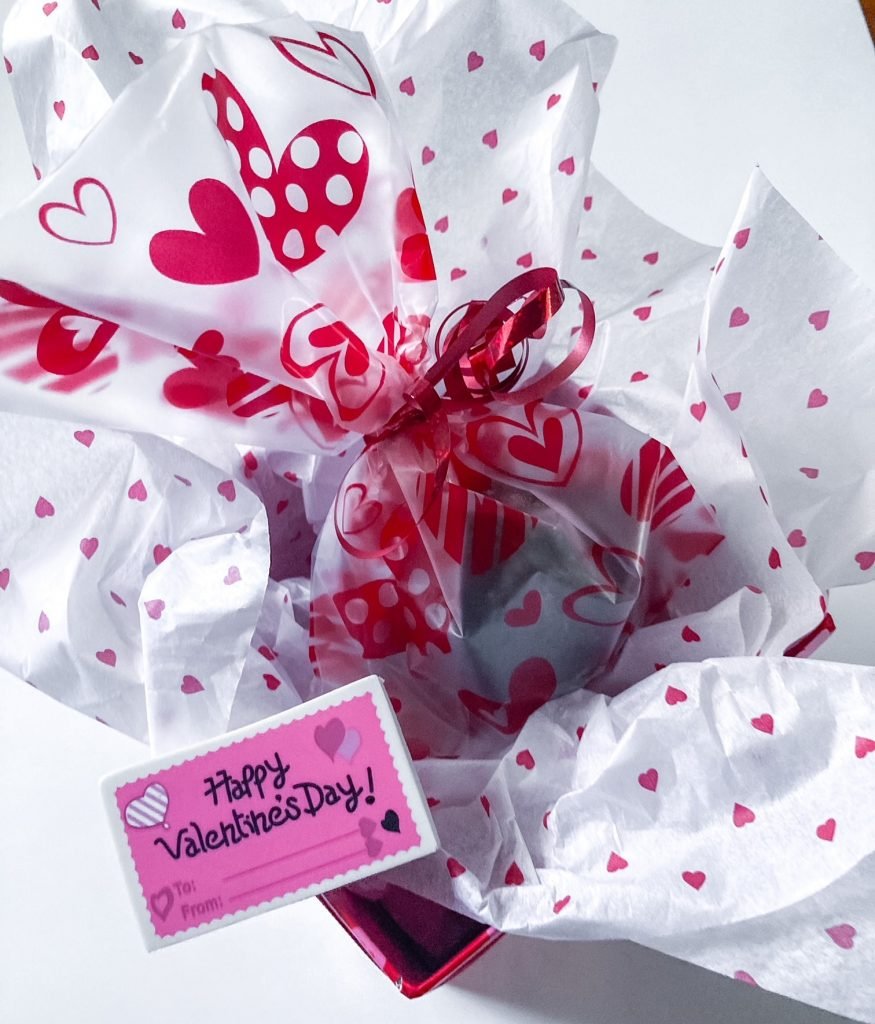
I hope you have fun making these chocolate bombs. They are a great idea for a special DIY Valentine’s Day gift for someone you love. I’m planning to give one to my mom and my mother-in-law this year. I even bought special food-safe bags to put them in and a cute V-day gift box. Check out how I styled them below, and let me know what you think.
If you like this recipe, let me know in the comments below. I would also appreciate it if you could share it online via Pinterest or any other social media. And if you’re interested in new articles, awesome recipes, health and beauty tips and affordable chic fashion ideas from The Savvy Dreamer, sign up for our newsletter below. You will get notified when we have exciting new contests in the works. We also have some freebies offered to subscribers from time to time.
Happy Valentine’s Day loves ❤️!
I am so on board with chocolate anything! These are perfect to make on a snowy day with the kids. SO good!
Oh absolutely, I hear you. Anything chocolate is so good. I think your kids will get a kick out of making these. It could get messy though, ha, ha.
I need to make these for valentines day! They look so cute and delicious!
Wow these look good! My kids would have so much fun making these 🙂
I hope you do. They are a lot of fun to make and of course, they’re delicious ❤️.
These are all the rage here! I was always curious how they were made. I want to try one, maybe for Valentines day. I too HATE the cold. LOATHE!
Ha, ha, glad to see we have something in common. Let’s just hope winter ❄️ doesn’t last that long, right? Thanks for checking out the blog 😍.
This looks absolutely amazing and so perfect for a Valentine’s Day treat! You make it look so easy…I would never have thought to attempt these at home but will need to give it a try now. Thanks for sharing!
You know what, I thought the same as you. I could never make these at home. And then I said “why not?” and tried it. I’m so glad I did and I love them. I’m going to make them all the time now. Beats buying them, ha, ha. Happy Valentine’s Day ❤️.
Love hot cocoa bombs!! Such a fun way to warm up
It is indeed, I totally agree with you. They’re perfect for this cold winter weather 😘.
Oooo. These look delicious! And great fun for after a long say of playing outside in the snow! I love how you used the circular silicone mold/baking dish. Wonderful! will have to try with the kids!
I hope you do try it with your kids. I bet they will love it especially after a long day playing in the snow ❄️.
They look amazing and the recipe sounds really good. I will definately add this to the list of things to make for next year.
Yes, please do. They are so much fun to make and of course taste delicious.
Delicious! My kids would love these!
Awe, I hope so. And these are so much fun to make.
Those look amazing! I never knew how they seemed the halves together
Yes, Katie, that was a mystery to me too, hehe. But now that we know it’s so easy. Right?
I can make a stash of these and keep them in the fridge! My nephews are chocolate fanatics! They will love this!
Haha! In that case, they will definitely go crazy for these. They are so fun too to watch the marshmallows pop up.